Volleyball Blocking Drills - How to Improve Blocking?
Take a look at volleyball blocking drills and learn some simple ways to improve blocking.
Drills are excellent for the beginning players to get the correct feel for the blocking – but also work very well for more experienced players who need to get back into the blocking mode quickly.
Volleyball Blocking Drills – Lower Net
One key to learn successful blocking techniques is; to practice it with the lower net.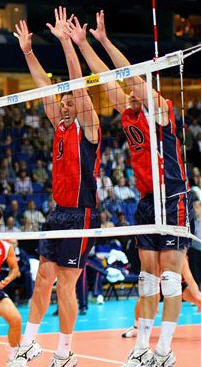 Why?
Why?Blocking without worries about timing and reaching high gets you into the blocking mode very quickly. It increases the amount of successful blocks and helps you to learn extremely quick.
Without timing and reach issues, you learn to keep your eyes open and place your body, hands and arms correctly.
Feeling is Important!
Players who have skipped this type of basic volleyball blocking drills often hasn’t experienced how does it feel to be blocking. The feel is important!
The feeling of successful blocks helps player to learn quickly how the arms and hands should be placed to put the ball straight down.
After you get the feeling of successful blocks with the lower net, you are ready to raise the net higher. Just try it – I promise it works.
Volleyball Blocking Drills Example
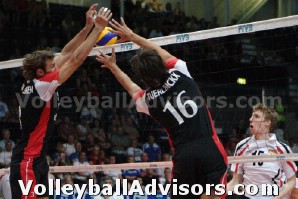 The first
progressions of these volleyball blocking drills teach basic techniques
to each individual player.
The first
progressions of these volleyball blocking drills teach basic techniques
to each individual player.Keep it simple in the beginning. Have hitters on the stand. Blockers focus on arm and hand position first without footwork.
Add Footwork, Double Block
After each player has learned how to place their arms and hands, the coach progresses by introducing the footwork. It is important to teach how to do the footwork in double blocks or triple blocks in cooperation with other players.
Block Against a "Real Spiker" - Run Drills Game-like
In the very beginning stage, the hitters who hit balls to the blockers hands should place themselves on the boxes.
However, it is extremly important to practice against spikers
who approach and get a set from the setter - as soon as the arm/hands position and footwork have been learned. The drills has to be game-like as soon as possible.
How to Organize These Volleyball Blocking Drills?
These first progressions are not game-like. The purpose is to teach correct arm and hand positions and footwork before progressing to the game-like drills.First the coach runs this drill with one blocker on each blocking position (left, middle and right) - and having a hitter on the stand in front of the blockers.
Shaggers - S
1-2 players per blocker should be shagging the balls and collect the blocked balls back into the ball basket. If the blocker stuffs the balls straight down, as the blocker supposed to do, there shouldn’t be too much shagging. Shaggers, S in the picture below, should locate themselves somewhere under under the block.
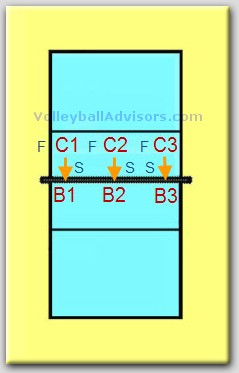
Coach or Assistant on the Stand - C1, C2, C3
Coaches or assistants who hit the balls into the block should be standing on the stand (or chair). It helps to put an accurate spike into the block.
Ball Feeder - F
To maintain the fast tempo on spikes, the coach should have a ball feeder to feed the balls from the basket.
Ball feeders with the ball basket, F in the picture, should locate themselves next to the person who is htting.
Blockers
B1, B2 and B3 in the picture.
Players
You need around 6-9 players to perform this drill on three positions. If you have more than 9 players, they should be doing the drill on the other court – or performing for example blocking footwork exercises on the side.
So this is the set up for beginners. Coach starts practicing following scenarios in it: arm/hand position, then adding movement and footwork in it - then moving towards game-like drills when players have learned the basics.
Volleyball
Blocking Drills - Three Step Progress to Learn Basic Blocking Techniques
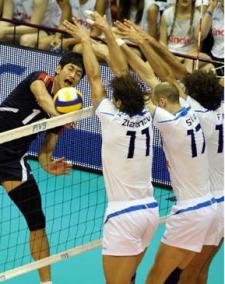 Progression I
-Arm / Hand Position - Without Jump
Progression I
-Arm / Hand Position - Without JumpIf blockers are very beginning volleyball players, they could be put on the stand (or chair), so they reach above the net without jumping.
Other way to do it is to put the net extremely low so they can reach above the net.
Progression II - Jump and Arm/Hand Position
A little bit more experienced players can jump – preferably using a lower net.
Progression III - Footwork and Jump and Arms/Hand Position
In the next progression players block start practicing movement by using various footwork techniques – still with the low net.
Volleyball Blocking Techniques - Adding Movement and Footwork for Outside and Right Side Hitters
Blocking Techniques I - for Side Blockers:Side blockers can start outside near the antenna and take a step to the left or right before the jump.
Blocking Techniques II - for Side Blockers:
Or they could start inside and make a swing block to outside blocking position.
Volleyball Blocking Techniques - Adding Movement and Footwork for Middle Blockers
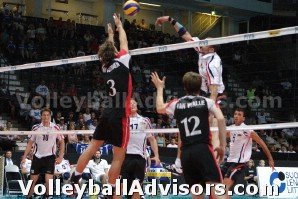 Blocking
Techniques I - Middle Blockers in the Middle
Blocking
Techniques I - Middle Blockers in the MiddleMiddle blockers in the middle work on stopping the cuts to the left or right by reaching to the left or right. They should also learn to take up to few short steps to the left or right before jumping up.
Blocking Techniques II - Middle Blockers on the Right of Left
It is important to let middle blockers practice movement and footwork to form a double block to the right and left. This way they learn for example turning inside when setting up the left side or right side double block. The most attacks come from the left or right side, so this should be practiced carefully.
Volleyball Blocking Drills - Middle
Blockers in the Middle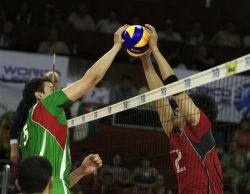
Middle blockers in the middle should work to block
- “two” balls, second tempo sets – C2 (in the
picture above) tosses
higher “two” ball into air and hits
- First tempo sets, "quick ones" – C2 performs
“quick 1 attack” just like the middle does.
- One advanced option is to put two hitters on two chairs in the middle, other is hitting "one ball" and other one "three ball". Hitters make the middle block either "the one ball", or after a couple of quick shuffles to the right the "three ball".
Volleyball
Blocking Drills - Blocking Line - Line Block
First players work on blocking the line shot. An assistant repeats the
line swings one after another. An assistant
should
hit at least 5-10 times with the fast tempo – before changing the
blocker.
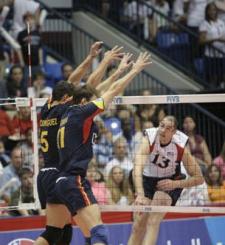
The assistant should give the “go”- sign for the blocker by slapping the ball in the beginning.
Few things to remember on the line swings:
- Outer hand in front of the ball.
- Turn inside! Make sure your toes are pointing slightly inside when landing. It turns your body inside, towards the middle of the court when in the air, which makes sure the balls land into the court, not out of bounce.
- Keep hands open and fingers spread, but relaxed. It allows you to block the ball straight down.
Volleyball
Blocking Drills - Blocking Angle or
Cross Court
After the line swings, players work on blocking the angle shot.- Outside blockers leave the line open
and block the angle shot.
- The block is very similar to the line block,
expect the player's location is further inside.
Volleyball Blocking Drills - Mixing Up Line Shots and Angle Shots
Volleyball Blocking - Mix up the Line Shots and Angle Shots
After players learn the difference of blocking line and angle, the assistant could start mixing them up by showing very clearly, which direction s/he swings the ball.Volleyball
Blocking - Read the Hitter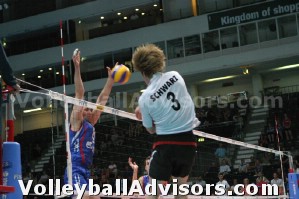
The blocker reads the
hitter and determines the direction and stops the ball.When moving into this phase, it is clear that blockers start missing more balls – but the coach should still keep in mind the main goal is to give as many blocks as possible to the hitters.
As mentioned above this blocking drill is only to teach the basics of blocking; how to position arms, hands and body and how to do the basic footwork.
Important! As soon as the basics have been learned the players need to practice blocking in more game-like context - i.e. blocking the hitter who makes a full approach.
Volleyball
Blocking Drills - Next Progressions - Game-like Blocking Drills
How
to makevolleyball blocking drills more game-like?Add a real swing against the blockers. You practice previous scenarios (ex. line shots, angle shots, quick attacks for the middle), but using a hitter who approaches, jumps up and swings the ball.
In this phase hitters learn to read the hitter. Start this phase as soon as possible after the arm/hand position and movement have been learned.
Options: 1) the hitters hit the ball from the coaches toss - or 2) from the setter's set - or 3) from the setter's set after a pass/toss.
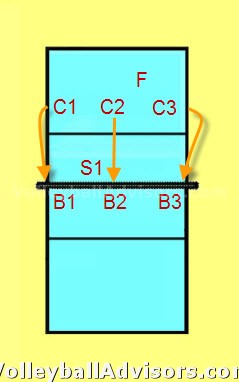
Example:
The coach uses setters and approaching hitters in the drill, instead of having the hitter on the stand. It helps blockers to learn to read the pass, the setter, the set and the approaching hitter.
C1, C2, C3
Instead of being on the stand C1, C2 and C3 should be hitting after an approach.
S1
The setter sets the ball outside, middle or right side.
F
Ball feeder mimics the pass and feeds "the pass" for the setter.
Few Tips:
In order to maximize the reps, the ball feeder needs to keep up a fast tempo. In the beginning, the setter sets the ball to outside, then middle, then right side - and repets the cycle. A new ball can be flying to the setter every few seconds when practicing single blocks.
Next Progressions in Volleyball Blocking Drills
- Practice double blocks. For example:
The middle blockers all line up to wait their turn in the middle position. The middle blocker starts from the middle, possibly blocks in the middle before moving left or right to form a double block.
Also right side and left side blockers need to practice starting inside and helping middle blocker to stop the middle attack.
- Practice triple blocks
- Block the back row swing
- Important!
Give the setter an option to set a ball to any of the two or three or
even more hitters. Until now blockers may have known where the setter
sets, since the goal was to learn the techniques and timing with the
hitters first. Now in this phase blockers learn
to read the setter
also. Ex. the setter could have an option to to choose
between outside
and right side hitter OR setter could choose between all three hitters,
etc.
- Organize
a game-like drill "the hitter vs. blockers". In the match hitters
usually are more successful than blockers. So if you
are running a wash drill, you
have to
give some advantage for the blockers to make the game even. When
running a wash drill, you may want to add defensive players
into
the defensive side.
- Add a server into the defensive side and
possibly add 1-2 passers into the offensive side.
- By adding coverage into the offensive side
the coach gives
hitters an option to play the ball back into the own side. For
blockers
it would give an opportunity to practice against those "soft spikes" to
the
block.
Like this page:


